3d House Model Making Supplies
These are the supplies you'll need when it's time to make a 3d house model of your home as part of the design process.
The 7 essentials for model making
There are 7 essentials for making your model:
Then there's a few other useful tools.
1 - Card
If you're making a 3d house model of your own home the model is for your own purposes rather than to win over a client. Card is usually sufficient for a DIY model.
Look for heavy card - at least 110lb or 300gsm weight.
Have a think about what the biggest wall of your model is going to be before deciding what size to buy. You can achieve joins by layering card so it may not be necessary to go for a big size.
Another material you can use is corrugated cardboard. If there's a cardboard box lying around just use that and you've got your materials for free!!
A bit of cardboard can also be useful to use a strip to stiffen the white card if necessary.
When you're working with a cardboard remember to account for the thickness of the board when you're making your cuts.

Materials to stay away from
You may be tempted to use foam core board or white corrugated plastic. These materials are more expensive and are hard to cut neatly. The less expensive materials we've already looked at will be sufficient.
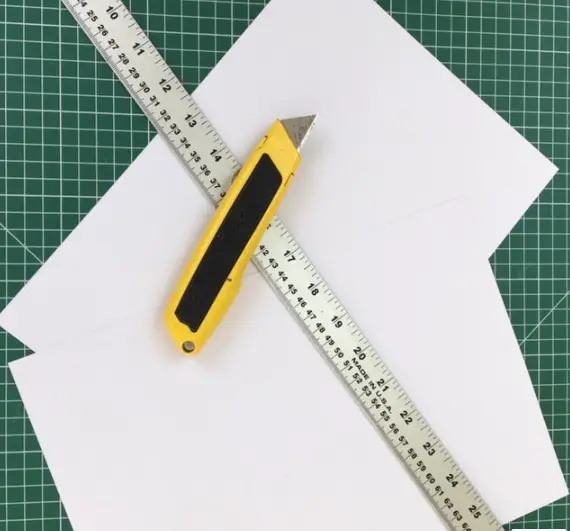
2 - Utility knife and blades
Cutting with a utility knife rather than scissors will ensure that your edges are crisp and straight (as long as you use a ruler).
This knife handles well and doesn't cause too much stress on your hand so you won't get sore if you plan to string together a few hours on your model. The blades are good quality and aren't too expensive to replace.
3 - Cutting Mat
When you use the utility knife the blade will go through the card and will cut into the surface beneath. You could cut onto a piece of wood but this has two disadvantages:
- The wood will wear out the blade.
- The cuts on the wood underneath will build up to form a web of lines which can catch on the blade and pull it off course.
With a cutting mat the blades will not dull as quickly and the surface is self-healing which means that there's no build up of past cuts to interfere with the line of your cutting. The cutting mats also have a grid which is very useful helping to keep things square.
There are a few sizes of cutting mat available. Get the one that suits the size of your model. Just so you know, cutting mats are better stored flat. They can be rolled, but then it takes a while to flatten them out again.
There are different colors available.
4 - Metal ruler
A metal ruler is essential for a clean and straight cut. Look for a ruler with a non-slip backing. The ruler below is another architect recommendation as it has a finger guard which is well worth it. If you're relatively new to model making the risks of cutting your fingers without a finger guard are higher than you'd think!
There are several sizes available. Get the size that makes sense with the size of your model.
5 - Glue stick
You need a glue stick to stick your floor plans and elevations to the card (which makes it quicker and easier to cut out). I find glue sticks just do this more neatly than wet glue.
6 - Glue or glue gun
As well as a glue stick for sticking flat floor plan and elevation sheets, you'll need glue or a glue gun to attach the walls in your model. Use only a few dots of glue along each wall so that you can more easily move the wall if you want to make changes.
Glue
This glue dries nice and clear. If you need to remove this glue to move the walls it tends to not rip up the card too much.
I suggest buying a normal size and a smaller 11/4 oz bottle. Use the 11/4 oz bottle and keep it filled up. Using the smaller bottle for gluing gives you more control.
Look for a glue with a nice nozzle and don't forget to clean the nozzles after each model making session.
Glue gun
The great thing about using a glue gun to attach the walls is when you need to make changes you just touch the glue dots with the metal tip and the glue must melts away making it super easy to remove.
You can get really cheap glue guns but a good one doesn't cost the earth and it's well worth it:
- More glue in each stick
- Heats up more quickly
- Better control dispensing the glue (look for one with a long trigger which also gives you more control)
Glue guns are electrical items so get the right voltage for your country.
7 - A six pack
A six pack may seem a strange essential for 3d model house making!
Mini cans are ideal for keeping your walls in place while the glue sets.
Other useful tools
Scissors
Scissors can also be handy for the odd cut here and there.
Tape
Glue can sometimes get messy and some people prefer to work with tape. The only thing with tape is that it is harder to remove and make changes to wall positions.
I've picked out some 1 inch tape here. You may think that 1 inch tape is quite wide. It's true that you'll see lots of tape on your model. The advantage of wide tape is if you are trying to tape up a long edge it's more forgiving if you don't get the tape exactly straight.
Getting a weighted tape dispenser can really help as it allows you to get a piece of tape with one hand.
If you prefer another brand make sure the tape will fit into the dispenser you buy!
If you don't want to see your tape then double sided tape is for you.
Tweezers
Some self closing bent-nose tweezers can be useful for putting and holding things in place while you're gluing.
Look for a tweezer that's at least 6 inches in length.


